Having an Issue(s) w/ Logo, Wordmark and/or Cover Photo Requirements on Substack?
Without an account, payment or even download—using just your mobile phone or tablet you can fix that in under 15 minutes or less.
Are you having issues uploading images at the right file type, format and/or resolution?
This simple how to guide will help you utilize a near perfect free website—to crop, compress, resize and set the aspect ratio for your image(s) for Substack and even other websites or personal projects for yourself in the future; no downloads, sign ups, or card required. Best of all you’ll be set in no time with the exact dimensions.
21:4, 600x600, 256x256?!
21:4 is actually an odd ratio, it’s not something even an intermediate shopper uses often.
This example is a walkthrough and can be used for each: logo, wordmark or cover photo for your Substack publication or profile—but these particular steps below are guided for the Wordmark; which seems to be typically the trickiest to satisfy, the same steps can accomplish all requirements in your scope or issues that you need to tackle.
Step 0: Use the highest quality image you have and try not crop your image too close to the text, artwork or graphic. See Step 5 (below).
Step 1: Click or visit: “Imageresizer.com” (link opens in a new tab)
Step 2: Choose your image/source.
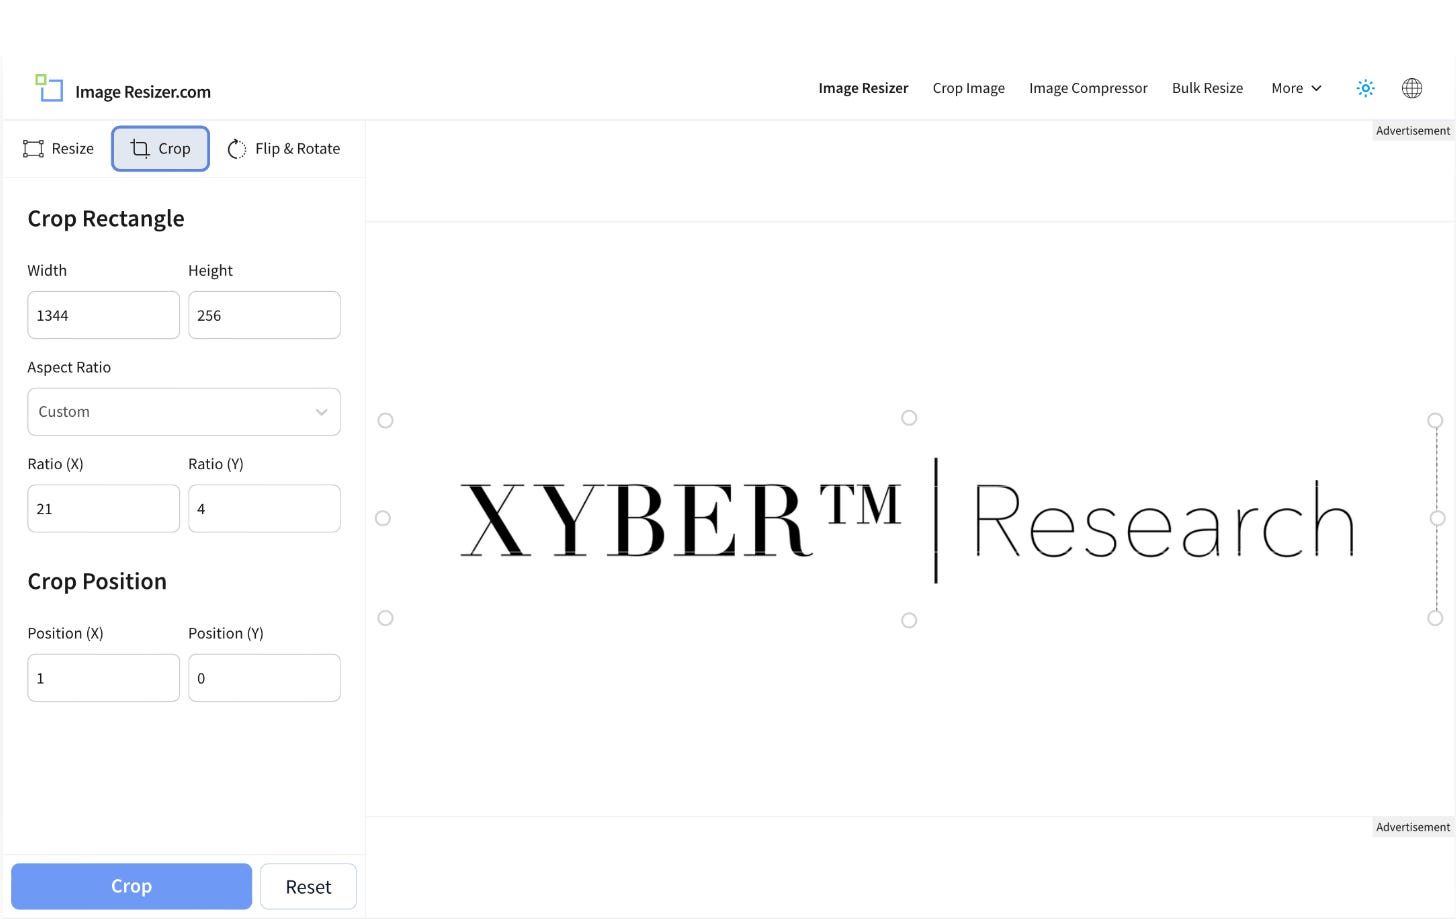
Step 3: Select Crop.
Step 4a: Change the Aspect Ratio first; click the dropdown labeled “Freeform” and change it “Custom” for best results.
Step 4b: Now set the Ratio; change the X input to 21, and Ratio Y input to 4; most important step.
Hint: X axis = vertical, Y axis = horizontal.
Hint: Either “600x600” or “256x256” are both a 1x1 (square) “Aspect Ratio” being set at equal dimensions.
Step 5: Now let’s set the Width and Height; as soon as you enter 1344 (width), the height should set automatically to (256). If you are having an issue setting the exact resolution, it may be because your image was cropped too small to begin with; there needs to be some wiggle room (see below).
Red: May cause specific issues.
Yellow: Same as above; custom parse.
Green: Preferred option to avoid issues.
Note: If you don’t have the crop room at this step you need to edit your raw image/logo; if you do have the crop room during this step, crop as close as possible—when you upload it/them to Substack you will notice the size and positioning and might have to adjust.
Recommend | Xybercraft ™
Step 6: Width/Height and Aspect Ratio are your best option for most edits. Crop Position (if applicable) is different for everyone’s image, you can probably so without it; it may actually mess up your set-settings.
Step 7: Click Crop (at the time of the writing yes there are two “crop” options on mobile view; they both do the same thing.
Note: If crop position(s) reset to 0; disregard.
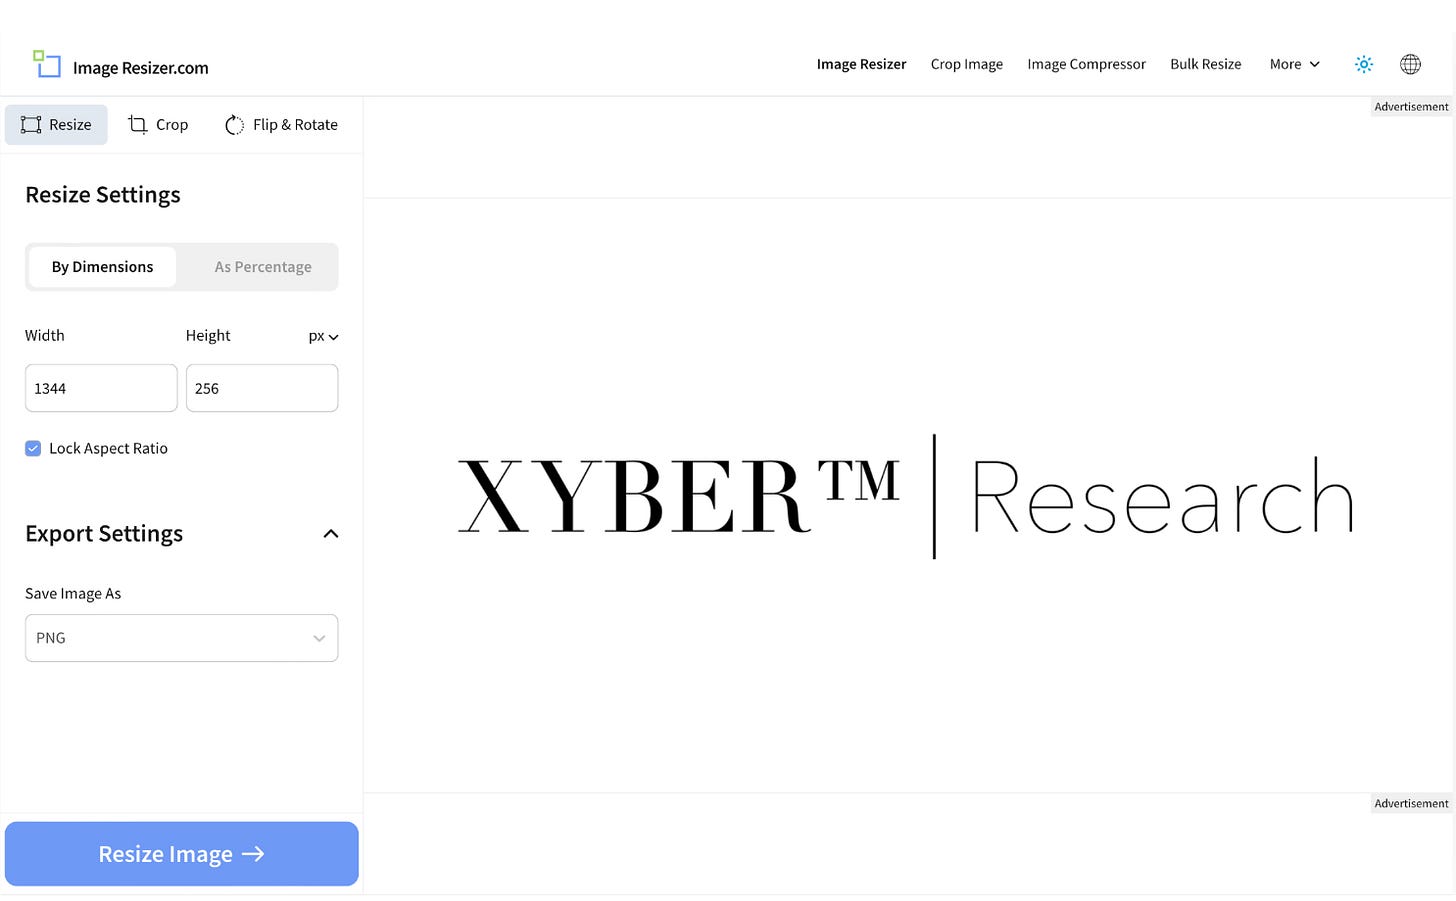
Step 8: Now click the resize tab; swipe down or click the X in the corner for mobile users—leave the (auto selected) “resize settings” set to dimensions unless you have a specific need for a percentage; and/or confirm your need—in my case it is 1344x256px.
Step 9: Export; id prefer it as a .png, for the transparent background. But if this output is for a personal website and lighthouse scores are must; choose .webp.
Misc: If you are having issues with resolution and cropping i.e., you can revert back to an old edit; the image you chose is basically in the rectangular form required—in certain cases you may be able to set an explicit “X and Y” directly to (21:4 ratio) in the Crop tab and exclude the additional options (i.e., WxH and Crop Position) and swing over to the Resize tab and set the 1344x256 pixel there, following your export and file format of your choice.
Summary
I hope this tutorial helps you out, the website presence or UX may update in the future so I’ll try to keep an eye out for changes to update this article as necessary, steps are interchangeable for your specific or custom need(s) and if the future it may be easier to just set the ration for your image/logo.
#HowTo, @Substack, #ImageResizer,
Recommend | Xybercraft ™


